In this guide, we're going to be covering how to configure your Zebra GK420D printer for printing Royal Mail 2D Barcode labels.
Mac users
If you are using a Mac operating system (OSX) and you are experiencing issues with printing thermal labels then please get in touch with our support team at support@zenstores.com.
Windows users
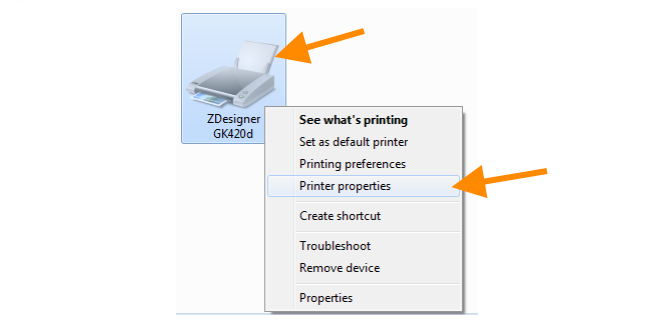
1. Select the 'Devices and Printers' option within the 'Control Panel' of the computer
Right-click on the Zebra printer and select 'Printer Properties' (Printer names may vary)
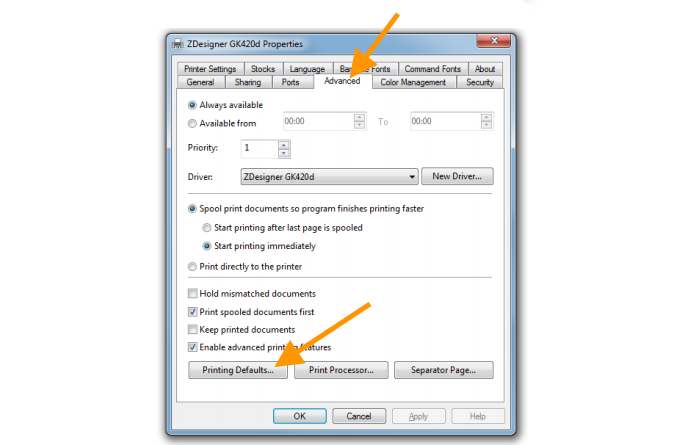
2. In the following pop-up window go to the 'Advanced' tab then select 'Printing defaults'
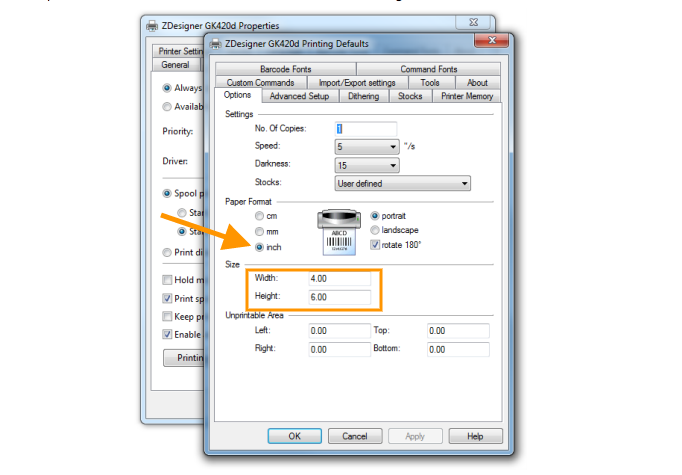
3. In Printing defaults set Paper Format to 'inch', Size Width to '4.00' and Size Height to '6.00'
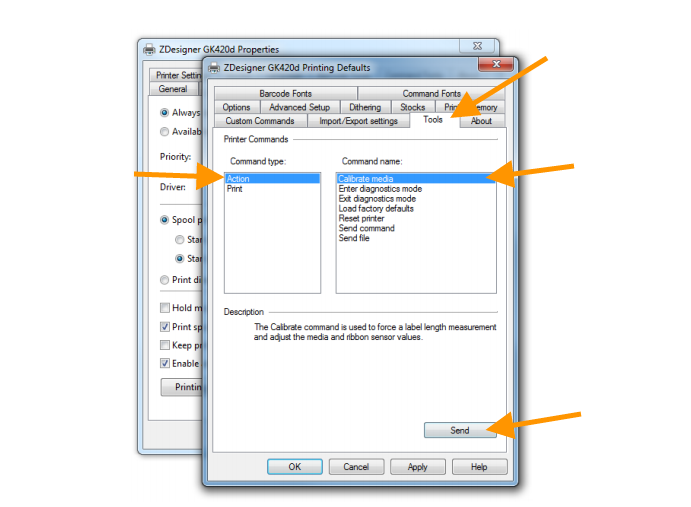
4. You will now need to calibrate your printer. To do this click on the 'Tools' tab.
Then click 'Action' and 'Calibrate media' then click 'Send' at the bottom of the page.
Please note: This will feed some blank labels through your printer.
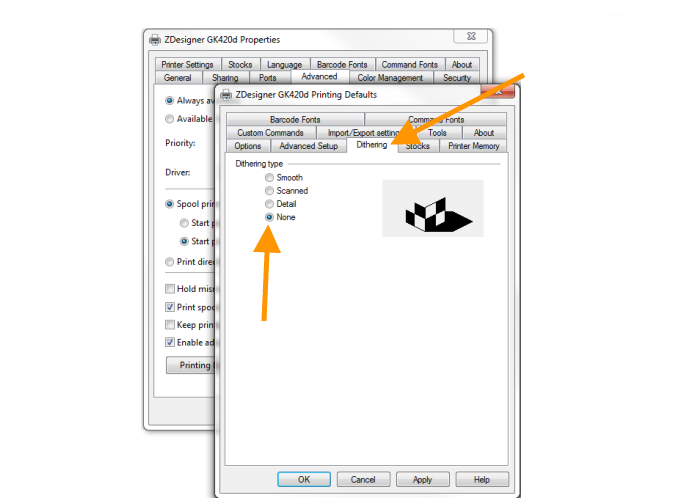
5. Next click on the Dithering tab and select none.
Then click 'Apply' and 'OK' and you will be returned to the 'Advanced' screen where you originally selected 'Printing Defaults'
Please note: Setting Dithering to None ensures that the newer 2D barcode is printed properly and will scan through the network.
Any other setting here reduces the accuracy of the 2D barcode to the point where the labels you produce may not scan through the Royal Mail network.
6. Now that the printer has been calibrated, you are good to go printing your Royal Mail 2D barcode labels in Zenstores.
Ship faster, sell more, delight every customer
Join thousands of brands using Zenstores to power every step of their ecommerce delivery experience.
