How to connect your Woocommerce store to Zenstores
In this guide were going to be covering how to connect your WordPress Woocommerce store to your Zenstores account.
A few notes before we continue:
- You must be using Woocommerce version 2.2 or newer
- The REST API and pretty permalinks must both be enabled (don't worry if you don't know what this means I'll cover it later)
- Woocommerce orders will only import into Zenstores if they have a status of processing
- If you have any domain redirects (http to https for example) please make sure that you use your actual end domain in step 12.
- If you are using any cache system such as varnish please ensure you disable the caching system for the woocommerce REST API endpoints.
Scroll further down if you prefer a step by step guide.
If you need any help connecting other stores please check out our connecting your stores guide
Step by step guide:
1. First of all fill in the name of your store

2. Then open a new tab and log in to your WordPress admin (http://www.mystore.com/wp-admin)
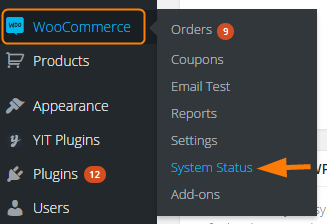
3. Then check which version of Woocommerce you are using. From your dashboard hover of Woocommerce and then click on System status.
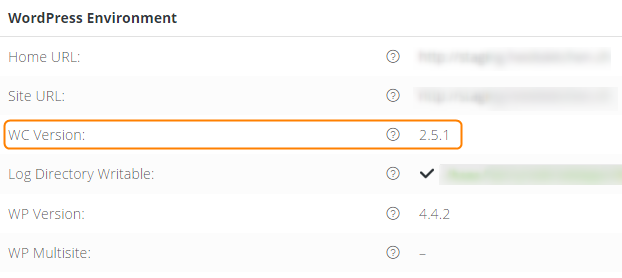
4. This will load up a System status page, just have a look and check that your version of Woocommerce is higher than 2.2. If it isn't then you will either need to update your plugin to a version higher than 2.2 or talk to your site developer for advice on how to do this.
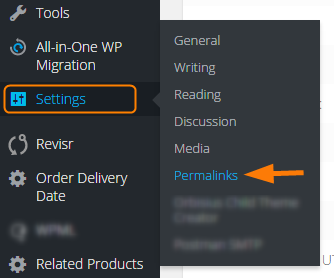
5. Next check that you have pretty permalinks enabled, hover over Settings and click Permalinks
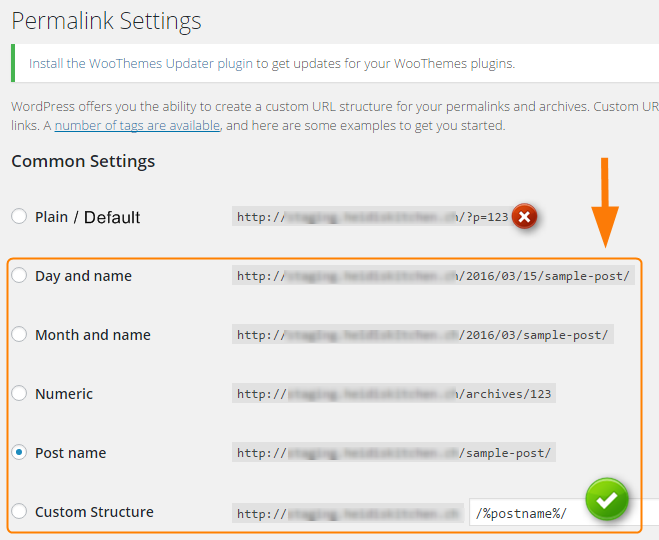
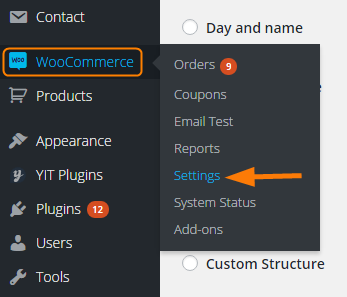
6. On the Permalinks page, for Zenstores to work you can have any permalink option selected other than the default one(changed to plain in the most recent update). So please make sure you select or have selected one of the following: Day and name, Month and name, Numeric or Post name
7. Now we need to enable the Woocommerce REST API, first of all hover over Woocommerce and click Settings
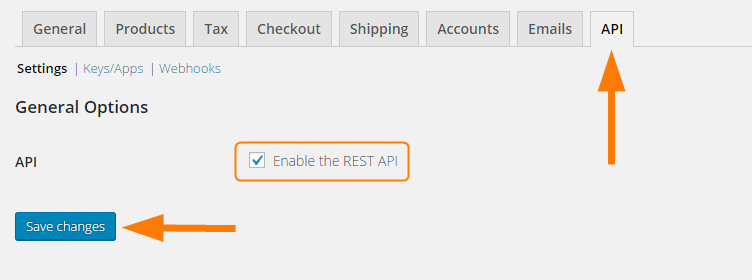
8. From the Woocommerce settings screen click the API tab, and then make sure Enable the REST API is ticked, if it isn't, tick it and click Save changes
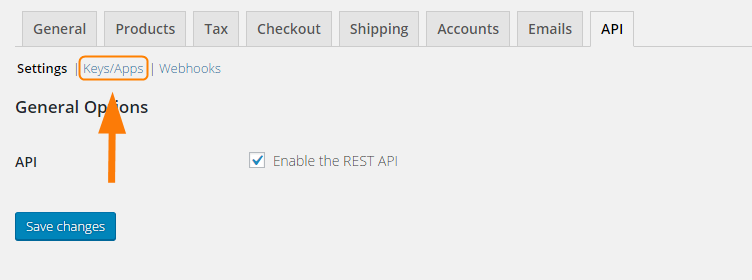
9. Now to get your Keys for copying and pasting into your Zenstores connection form. Firstly click the Keys/Apps link that is in between Settings and Webhooks
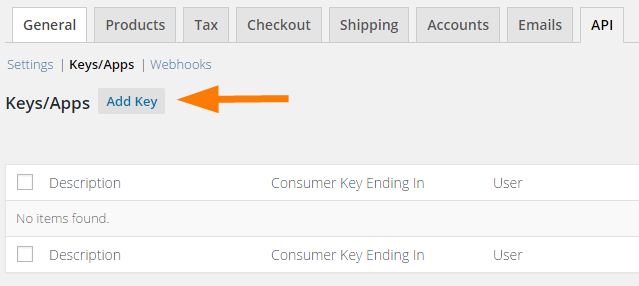
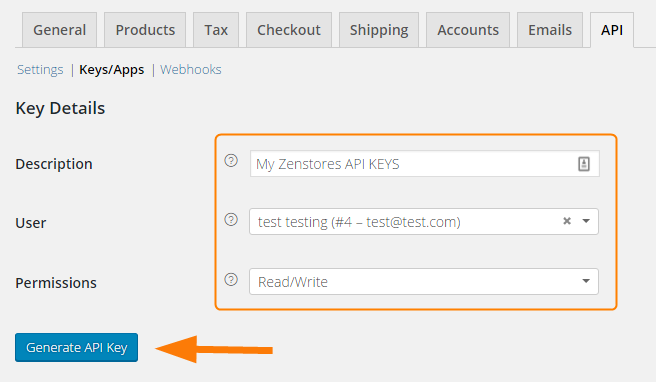
10. Then click Add key
11. Next fill in the New Key form, the Description can be anything of your choosing (although I would suggest to have Zenstores in there for later reference), then select a user, making sure they have Administrator privileges and finally select Read/write from the permissions drop down. Then once you have finished with the form simply click Generate API Key.
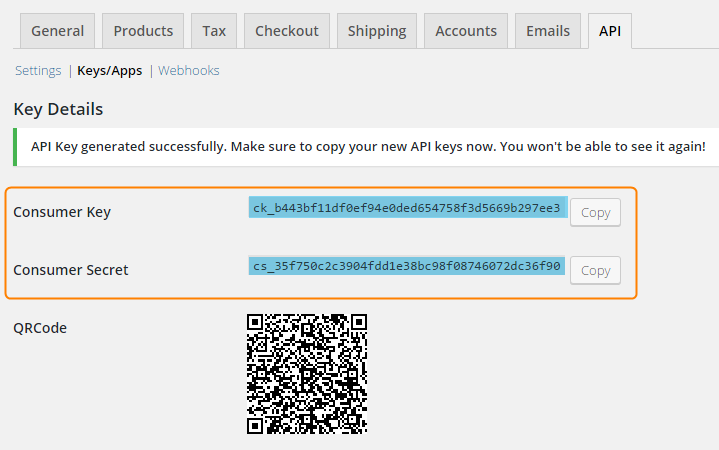
11. You can now copy your Consumer key and Consumer secret into the relevant fields in your Zenstores form.
Please note: don't close this page without copying your keys over otherwise you will have to start again.
From WordPress copy these Keys
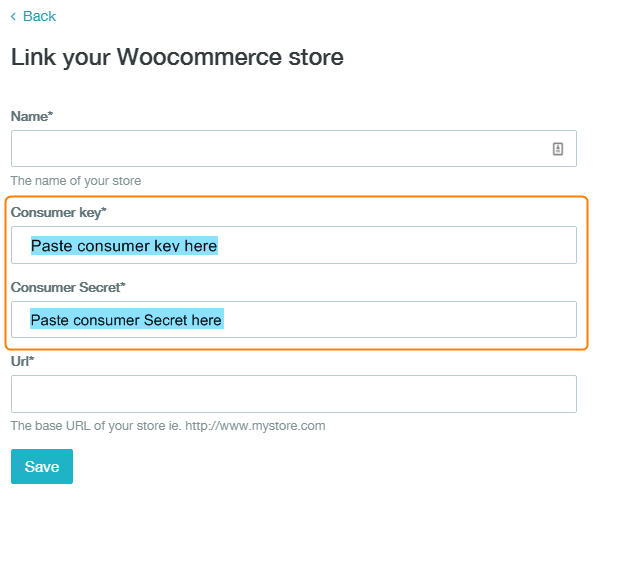
In Zenstores paste the keys into these boxes
12. Then finally put the web address of your shop into the Url box at the bottom and click Save
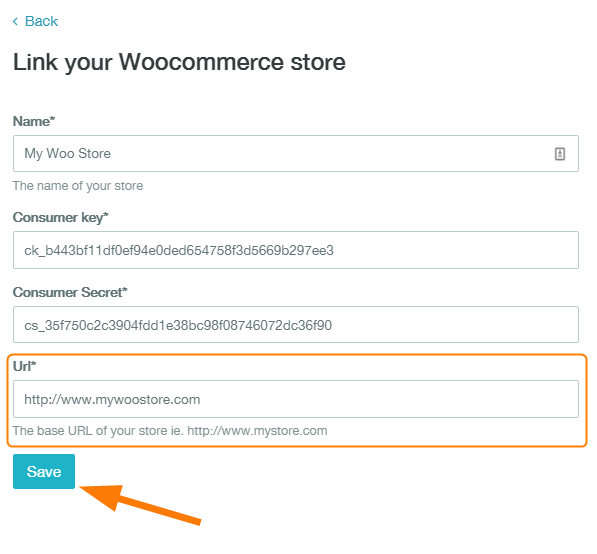
Shortly after you click save your Woocommerce orders should start appearing in your Zenstores account.