Part 4: Managing Amazon orders with Zenstores
Zenstores also has a number of tools and features that can be used for order management to further improve your packing and dispatch process. Within your Zenstores account you will be able to create multiple users for one account, assign orders to team-mates, flag orders and sort them, add team notes and manual customer notes.
Setting up team members in Zenstores
If your ecommerce company has multiple employees then it will be useful to set them up as separate users on your Zenstores account. You’re able to set up as many users on your Zenstores account as you like, each with their own login details, and then assign orders to different users and add notes to orders for them. It’s also possible to manage what team members can access by managing your team’s permissions.
Adding a team member:
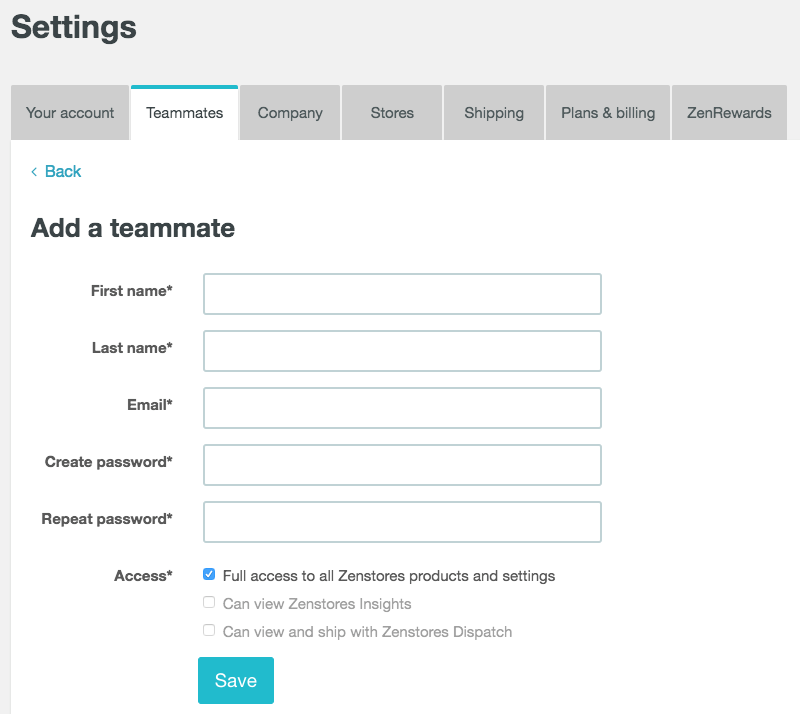
- Within your Zenstores account hover over ‘Settings’ in the top right hand corner. Then select ‘Teammates’.
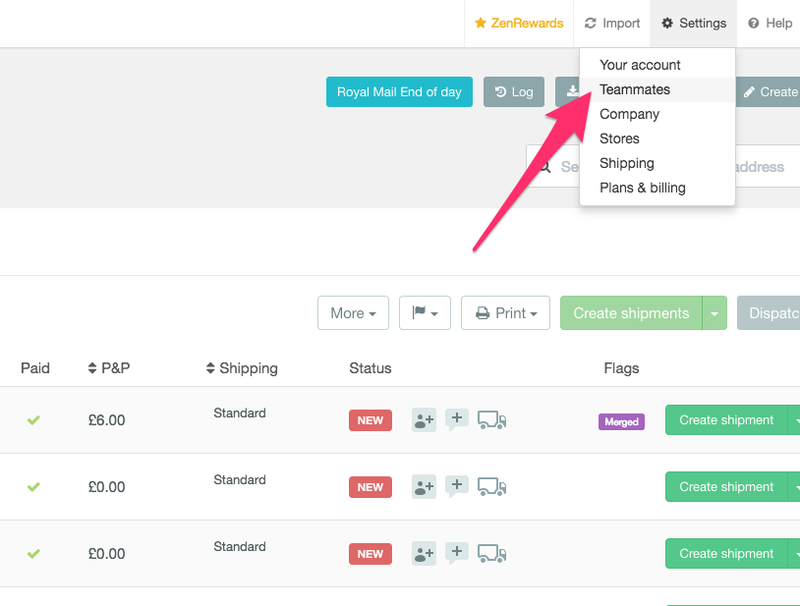
- You’ll be taken to a settings page where you can see current users and click ‘Add a new user’.
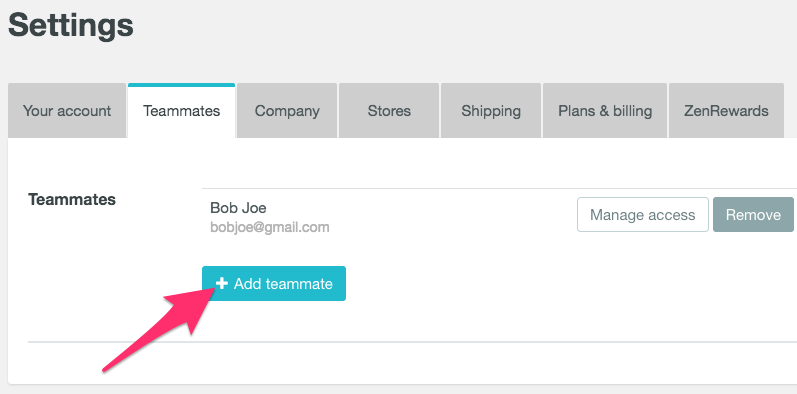
- You can then add the team member’s first and last name, email address, and create a password that they can use to log in. Once you’ve filled in all the required details click ‘save’.
With different team members set up on your Zenstores account you can organise orders and split the workload by assigning orders to different members of staff.
Assigning orders:
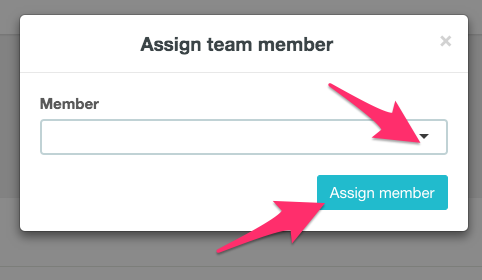
- In the New orders list you will find an ‘Assign new team member’ icon on the right hand side of each order.
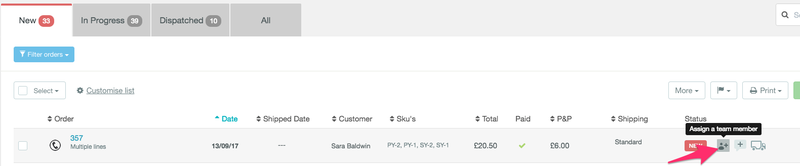
- Once you click on the icon a popup will appear where you’ll be able to choose a team member from a drop down list, then click ‘Assign member’.
Filtering orders by team member:
When orders have been assigned to team members, you can then filter the orders by each team member.
- On the New orders page, click ‘Filter’ in the top right hand above the list of orders.
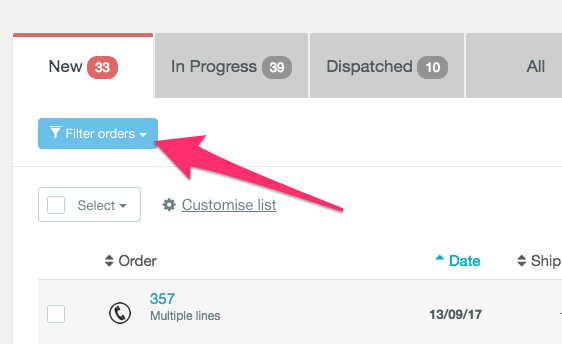
- In the popup that opens, click on the ‘Assigned users’ drop down menu to choose a team member to filter by.
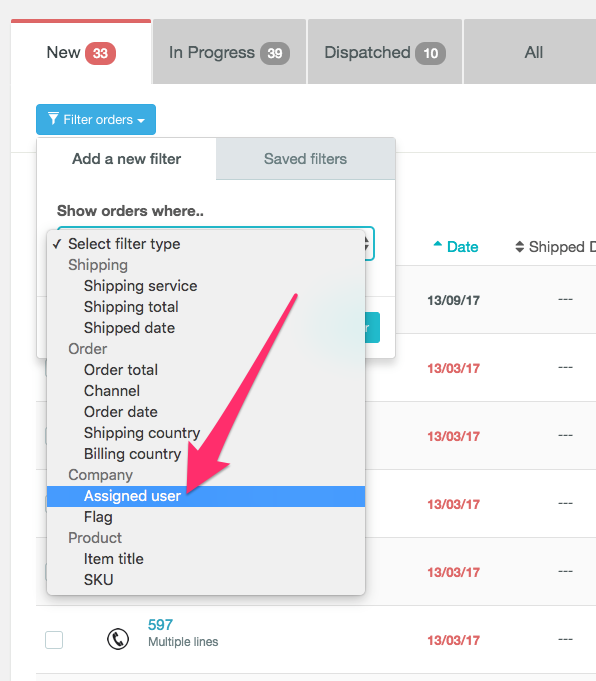
- Click ‘Add filter’ and then you’ll see all the orders assigned to that person.
Organising Amazon orders
With Zenstores you can also keep your orders organised by flagging your orders with a particular label, and by customising your order list by their status or SKU etc.
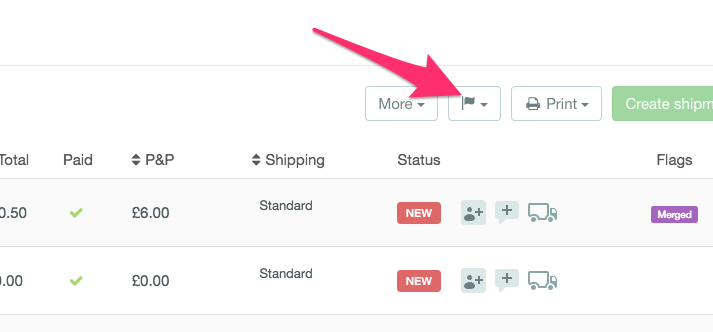
Flagging orders:
- In your New orders page click on the flag button at the top right of the list.
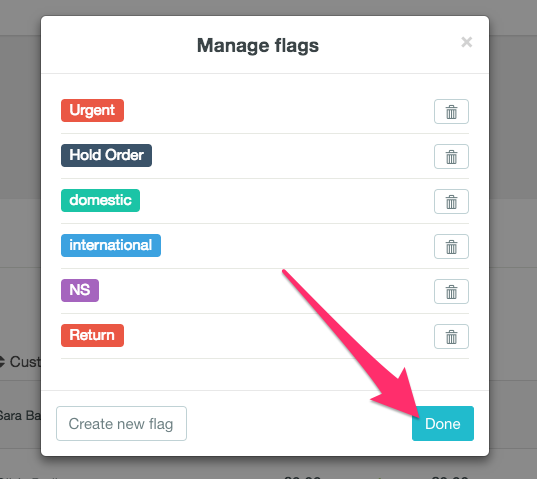
- From the drop down menu, click on ‘Create/Manage flags’.
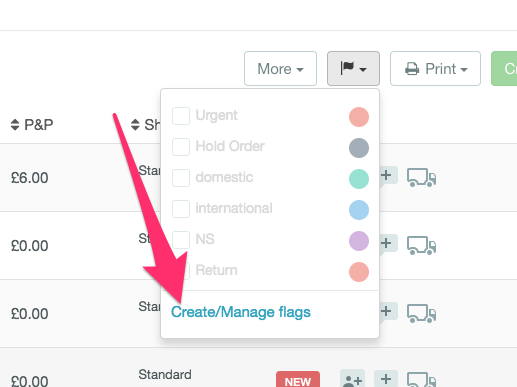
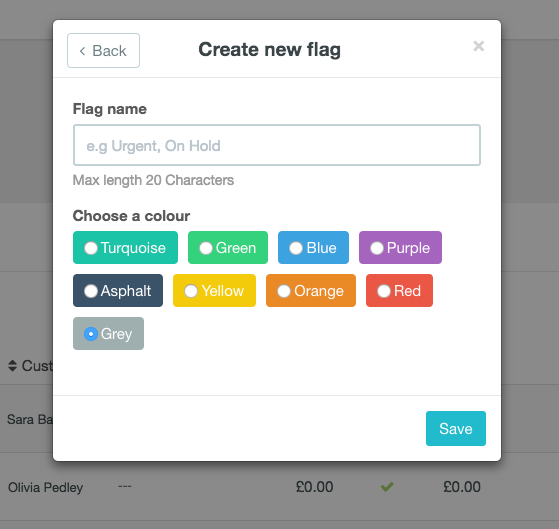
- In the next window, you’ll be able to name the Flag and choose a colour for it. Click ‘Save’.
- You can then see all the flags you’ve created, then click ‘Done’.
- You’ll then be back at your New orders list. Use the checkboxes to the left of your orders list to select all of the orders that you want to flag.
- Go to the top of the orders list and click on the Flag button. You’ll then be able to select one of the flags that you’ve created from a drop down menu.
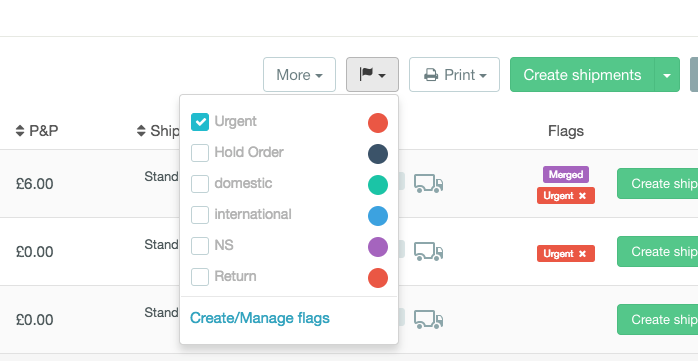
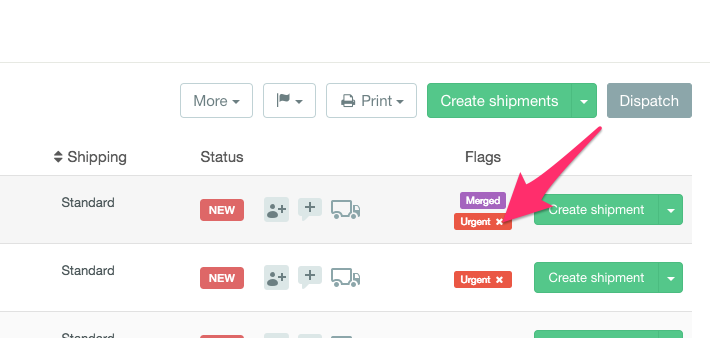
- Once you click out of this popup all the orders that you selected will be flagged with that flag.
- You can remove any flags by clicking the cross in the corner of the flag in the orders list.
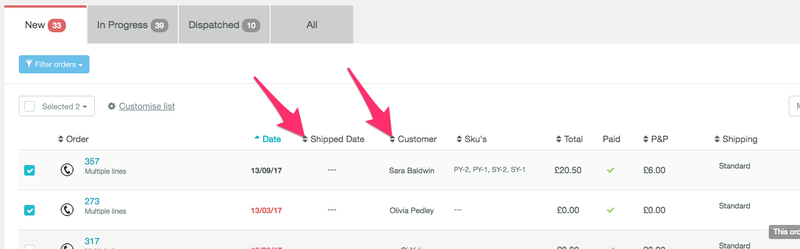
Customising the order list
By customising your order list you will be able to sort orders by SKU, postage choice, recently shipped etc.
- Click the ‘Customise’ button in the top right above the search bar.
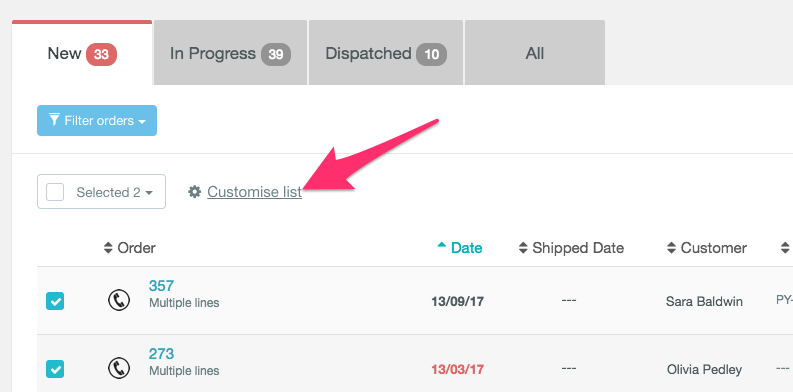
- A popup will appear with your default order list.
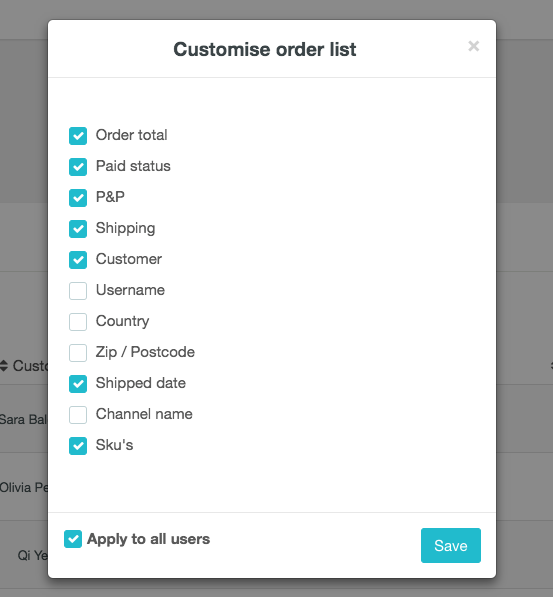
- You’ll be able to add and remove the colours that are displayed in your order list, by ticking or unticking the check boxes on the left.
- It’s possible to make these changes visible to all users on your Zenstores account by checking ‘Apply to all users’ or just to the main account holder by leaving the check box blank.
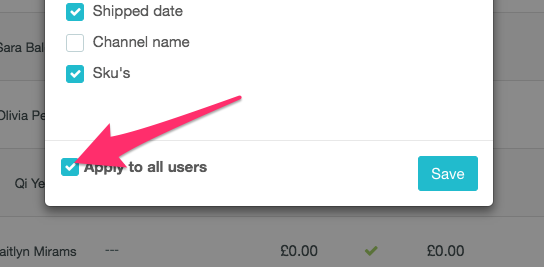
- When you’ve finished making changes, click ‘Save’.
- You’ll now see all the columns that you added in your orders list. You can then sort orders by clicking on the arrow to the left of each column’s title.