How to print thermal DPD test labels using a Citizen CLP-521 printer
If you're having issues printing your DPD test labels using Zenstores, then please see below for the optimum printer settings.
Browsers tested
- Chrome Windows
- Firefox Windows
Printer
- Citizen CLP-521
Step 1 (label setup)
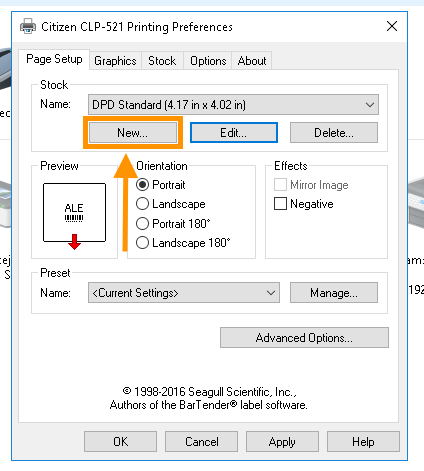
1. First of all, create a new default label stock for your printer. Click new in the Stock drop-down options.
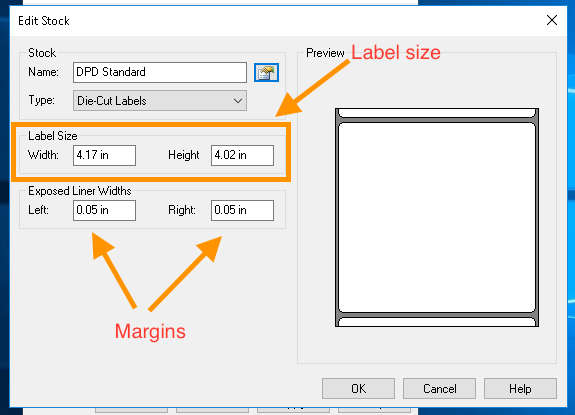
2. Then set your label dimensions to be the same as below.
- Width : 4.17in : 106 mm
- Height: 4.02in : 102 mm
- Left Margin: 0.05in : 1.27 mm
- Right Margin: 0.05in : 1.27 mm
Step 2 (Printing your labels)
From your browser's standard print dialogue select your previously defined paper size, make sure that "Fit to page" is turned on and then click the print button.
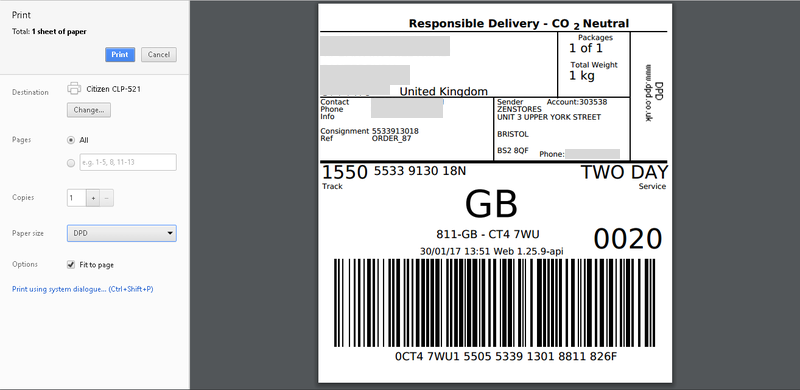
Please note the above image is for Chrome's print dialogue
Step 3 ( Validation )
You now need to double check everything as DPD are very strict on their label validation.
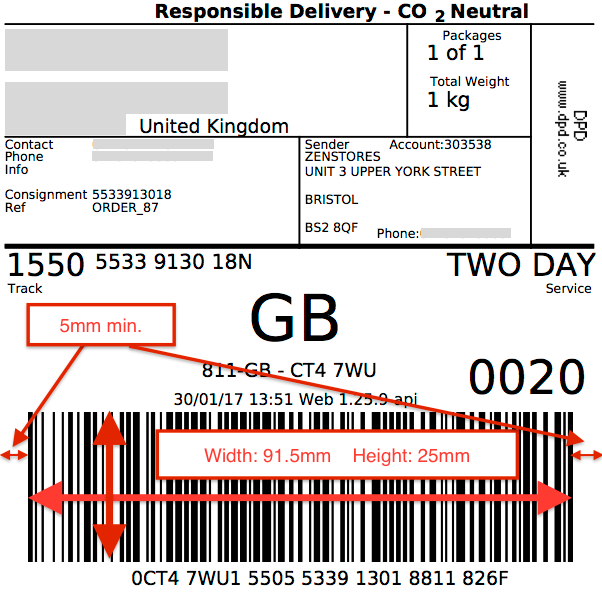
- The barcode needs to be a minimum of 91.5mm wide by 25mm high
- The space between the label edge and barcode must be at least 5mm
DPD are very strict on barcode measurements so it’s important that you check the printed labels with a ruler before sending off for approval.
Label measurement requirements: